I hope you all are having a great day, and welcome back to Free Online Bartending School.
Today, we will cover the home bar setup so that you can actually practice being a bartender.
One skill of the bartender is to be able to memorize all of the ingredients in a cocktail. The other skill is to actually make the cocktails in a speedy manner. As I touched briefly in a previous post, you will need to be able to make six cocktails in one minute. That is the minimum you have to do to pass bartending school.
I will start to post cocktail recipes in a future post, but before that we will need to setup a bar at your home to actually practice making the drinks.
If you have the luxury of attending a bartending school, this is the kind of setup you will be able to practice in. They create a setting with a real bar feel, so it is very nice to be able to practice here to get a good understanding of a real bar.

If you're not as fortunate to attend a bartending school, or you just want to save a few bucks, I'm going to show you how you can go about setting up your home bar for practice. I found a picture below to see what your ultimate home bar setup may look like.

Of course, at this time, we're not going this far out.
You are more than welcome to go out and buy the entire set with the money you save from not attending bartending school. But if you're like the most of us, you probably don't want to spend more than $20 to setup and practice with your home bar.
So here are the bare minimum you would need to purchase (or find) to practice your skills to become a bartender.
The essential step will be to set up your speed rack and items around it. These are the "stuff" you will need to get in order to setup your own home bar for practice.
Setting Up the Speed Rack and the Items Around it for Practice
- Empty bottles - It will be great if you can get empty bottles of the actual base liquor - from Vodka to Vermouth. If you got a buddy who drinks a lot tell them to save the bottles for you. You can also try going to a local bar, and asking the bartender if they can save the empty bottles for you. Since bartenders usually throw away the empty bottles, they maybe happy to save them for you. If all else fails, you can use larger water bottles like the one for SmartWater. You'll need to save 15-20 bottles to setup your home bar with.


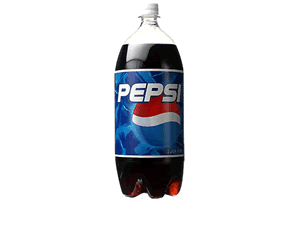
- 2 Liter Bottles - Since we are unable to mimic the speed gun, we will need to substitute that with a two liter bottle of coke, sprite, tonic water, and soda water. If you ever bartend outside, at a home party, or at a casual event, you will be using two liter bottles to bartend with. So this should be sufficient for you to practice at home.
- Speed Pourer - Speed pourers are an essential part of being a bartender. You will need to become comfortable with them, so getting these are a must for a bartender starting out. The problem is where to buy them. Grocery stores and liquor stores do sell speed pourers, but tend to be overpriced (2 for $6.99). The best prices I saw were on eBay, and you can buy a dozen for about $8. You should be okay with just getting a dozen at this point.

- Food Color Set - You will need to get food coloring to add color to the water that you will be filling your empty bottles with. Basically the point of color is to mimic the actual bottle of alcohol in order for you to get a real feel. Bartending schools usually use fake colored water so that their students can practice making drinks with. You will need to do the same to practice at home.

- Colored Sponge (Yellow, Green, and Orange) - You will need colored sponge to mimic the cut fruits for your drinks. Basically, a yellow sponge will mimic a lemon, green sponge a lime, and orange sponge an orange. Cut it into to small pieces for you to be able to throw into the drinks. The size of the sponges should be similar to the size of an actual cut lemon, lime, or orange. After cutting them, place them separately into small bowls for storage and use.

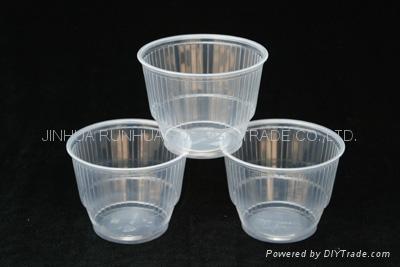
- Cups - It will be great if you can get all the different shapes and sizes referred in my glassware page. You maybe able to find them at a local 99 cent store or at a local Goodwill. Of course, if this is too much of a hassle, we can try it out by using plastic cups. As a bartender, you will have situations where you will be working with just plastic cups (like a pool event), so you should be able to practice with them. If you're going with plastic cups be sure to get the tall one and also the short one since you will need both.

Optional Items:
- Bag of Ice and Ice Scooper - Ice would be nice to have to be able to practice with since having it around will help you understand how much ice to put into a drink, and how ice will affect the volume of the cocktails. However, since this is an additional expense, you may want to save it for a final exam you will give yourself. The best scenario in this case is if you have an ice maker at home. Many refrigerators do come with an ice maker feature, so if that's the case, start cranking it up to make a lot of ice for you to practice with.

Bartender's Tools to Get
The remaining are tools of the trade that you should get as a bartender. I would recommend getting all of it, but if your budget is tight, get the jigger, then the shaker. A bar mat is nice to have is not an absolute necessity. Refer to my page on Basic Bar Tools to understand what each one of them are.
- Jigger
- Shaker
- Bar Mat
So to review, here is your shopping list of things to get:
Shopping List
- Empty Bottles (15-20 minimum)
- Two Liter Bottles (4 of them)
- Speed Pourer (A pack containing a dozen)
- Food Color Set
- Colored Sponge (One of Each: Orange, Yellow, Green)
- Plastic or Real Cups (Tall and Short - 5-10 each should be fine)
- Optional: Ice and Ice Scooper
- Bar Tool: Jigger
- Bar Tool: Shaker
- Bar Tool: Bar Mat
With all the things from the list above, you will be able to set up your home bar to practice with.
Instructions:
- Clean the empty bottles. Label it if you're using water bottles. Fill it up initially with water. Then add color to the water that mimics the real color of the liquor.
- Place speed pourers onto the bottles. Line up the bottles in the order of the speed rack using: "Very Sexy Girl Bartenders with Tight Trousers make Radical Bartender."
- The speed rack should take up 10 bottles. Use the remaining bottles to setup for the ice bin.
-Orange Juice (Orange)
-Cranberry Juice (Red)
-Grapefruit Juice (Pink/Yellow)
-Pineapple Juice (Yellow)
-Sour Mix (Green)
-Grenadine (Red)
-Pina Colada Mix (White)
-Cream (White).
To make a white colored water, we used water with paint primer, but this isn't recommended in a home setting. If you can find white food coloring, that would be best. If not, just use clear, or define a color for yourself. - Clean the 2 Liter bottles and fill them up with water. Color the water accordingly.
- Cut up the sponge, and place them into a bowl.
- Set up your cups and ice. If you have a bar mat, set that up. Place your jigger and shaker on it.
- You are striving to mimic a real bar setting. Of course, this won't be 100% possible, and you will need to improvise a lot in order to save money. The best practice at this point will be to imagine yourself hosting a home party, and how you will setup that bar.
You may want your bar to look like this:

But something like this is sufficient too:

All right, so this will conclude this lesson for now. I'm sure there will be a lot of questions and unclear points about this lesson, so feel free to ask me using the comments feature. I will try to answer them as soon as possible.
Also, if you have better methodology with regards to this lesson, please be kind to share that with us. This is one of those lessons that needs improvement, feedback, and contribution from others to make it work for everyone.
So till next time, good luck studying and collecting these "stuff." We will start to cover cocktails to memorize starting next lesson.
Cheers!
4 comments:
Amazing blog .Thanks for sharing with us! If someone looking for a best quality home bar for sale then you should visit in the given link!
Hire My Cooks provides superior bartending services in Delhi, including competence, friendliness, and professionalism.
bartender in delhi
Yum
cool
Post a Comment